How to install a blade protector on a motor grader blade?
 Language
 Français
 Español
 Árabe
Árabe
 Deutsch
 简体中文
简体中文
 Português
 Русский
 日本語
日本語
 한국어
한국어
 हिंदी
हिंदी
 Prancis
 Türkçe
 Tiếng Việt
 Italiano
 ไทย
ไทย
-
Tel
+86 15275228746
-
WhatsApp/WeChat
8615275228746
Blog
Company intro
10000m 2+ Cover Area QINGDAO TOP RUN INTERNATIONAL TRADE CO., LTD Qingdao Top Run International Trade Co., Ltd. has been a professional and leading supplier of construction machinery spare parts in China for over 15 years. With extensive experience and expertise, we have established strong partnerships with top manufacturers to offer a wide range of genuine and OEM parts for brands such as XCMG, SANY, ZOOMLION, SHANTUI, LIUGONG, and more. 80+ Employees View more Looking for properate products? Contact us
Send Message
How to install a blade protector on a motor grader blade?
Jul 23, 2025
View: 133
As a supplier of Motor Grader Blades, I understand the importance of proper maintenance and protection of these essential components. One crucial aspect of maintaining a motor grader blade is installing a blade protector. In this blog post, I will guide you through the process of installing a blade protector on a motor grader blade, ensuring its longevity and optimal performance.
Why Install a Blade Protector?
Before we delve into the installation process, let's briefly discuss why installing a blade protector is essential. A blade protector serves several purposes:
- Protection: It shields the motor grader blade from excessive wear and tear, reducing the risk of damage caused by abrasive materials, rocks, and other debris.
- Longevity: By minimizing wear, a blade protector extends the lifespan of the motor grader blade, saving you money on frequent replacements.
- Performance: A well - protected blade maintains its sharpness and shape, ensuring efficient grading operations and a smoother finish on the graded surface.
Tools and Materials Needed
To install a blade protector on a motor grader blade, you will need the following tools and materials:
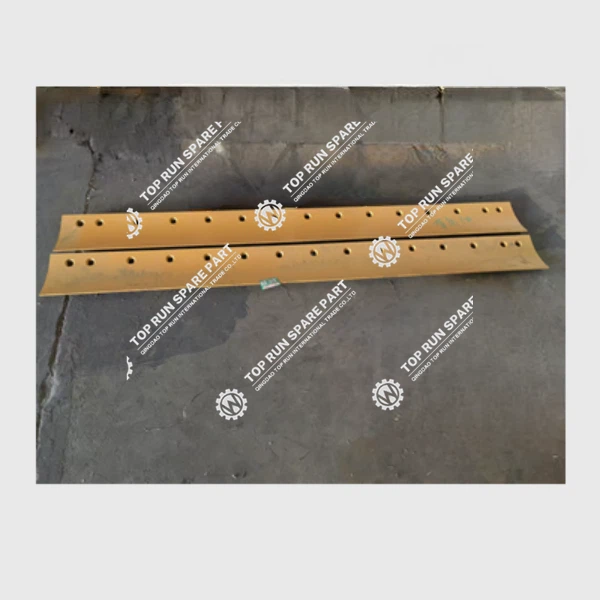
- Blade Protector: Ensure that the blade protector is compatible with your motor grader blade model. You can find a wide range of Grader Blades and related accessories on our website.
- Wrenches: A set of wrenches in various sizes to loosen and tighten bolts.
- Screwdriver: Both flat - head and Phillips - head screwdrivers may be required depending on the type of fasteners used.
- Measuring Tape: To ensure proper alignment and placement of the blade protector.
- Safety Gear: Safety glasses, gloves, and steel - toed boots to protect yourself during the installation process.
Step - by - Step Installation Process
Step 1: Prepare the Motor Grader
- Park the Grader: Park the motor grader on a flat, stable surface and engage the parking brake. Make sure the engine is turned off and the key is removed to prevent any accidental movement during the installation.
- Inspect the Blade: Thoroughly inspect the motor grader blade for any signs of damage, such as cracks, bends, or excessive wear. If the blade is damaged, it should be repaired or replaced before installing the blade protector.
Step 2: Clean the Blade Surface
- Remove Debris: Use a wire brush or compressed air to remove any dirt, rust, or debris from the surface of the motor grader blade where the blade protector will be installed. A clean surface ensures a proper fit and better adhesion.
Step 3: Position the Blade Protector
- Measure and Mark: Use a measuring tape to measure the length of the motor grader blade and mark the center point. This will help you align the blade protector correctly.
- Align the Protector: Carefully position the blade protector on the motor grader blade, aligning it with the marked center point. Make sure the protector is straight and parallel to the edge of the blade.
Step 4: Attach the Blade Protector
- Insert Fasteners: Depending on the type of blade protector, insert the appropriate fasteners (bolts, screws, etc.) through the holes in the protector and into the corresponding holes in the motor grader blade.
- Tighten the Fasteners: Use the wrenches and screwdrivers to tighten the fasteners securely. Start by tightening the fasteners loosely, then go back and tighten them evenly to ensure a proper fit. Do not over - tighten the fasteners, as this can cause damage to the blade or the protector.
Step 5: Check the Installation
- Inspect the Fit: Once the blade protector is attached, visually inspect the installation to ensure that it is properly aligned and securely fastened. Check for any gaps or unevenness between the protector and the blade.
- Test the Movement: Gently move the motor grader blade up and down to check if the blade protector interferes with its movement. If there are any issues, adjust the fasteners or the position of the protector as needed.
Additional Tips and Considerations
- Regular Maintenance: After installing the blade protector, it is important to perform regular maintenance checks. Inspect the fasteners for tightness and the protector for any signs of damage or wear.
- Compatibility: Always ensure that the blade protector is compatible with your motor grader model and blade type. Using an incompatible protector can lead to poor performance and potential damage.
- Replacement: Over time, the blade protector may wear out and need to be replaced. When replacing the protector, follow the same installation process to ensure a proper fit.
Related Spare Parts
In addition to blade protectors, we also offer a variety of other motor grader spare parts, such as Motor Grader Injector for XCMG and Gear Pump 803084054. These spare parts are essential for maintaining the optimal performance of your motor grader.
Contact for Procurement
If you are interested in purchasing motor grader blades, blade protectors, or any other motor grader spare parts, we invite you to contact us for procurement. Our team of experts is ready to assist you in finding the right products for your needs and providing you with the best service.
References
- "Motor Grader Maintenance Manual", Manufacturer's Guide
- "Best Practices for Blade Protection in Motor Graders", Industry Research Report
Categories
QR Code


