How to replace the synchronizer in a truck crane gearbox?
 Language
 Français
 Español
 Árabe
Árabe
 Deutsch
 简体中文
简体中文
 Português
 Русский
 日本語
日本語
 한국어
한국어
 हिंदी
हिंदी
 Prancis
 Türkçe
 Tiếng Việt
 Italiano
 ไทย
ไทย
-
Tel
+86 15275228746
-
WhatsApp/WeChat
8615275228746
Blog
Company intro
10000m 2+ Cover Area QINGDAO TOP RUN INTERNATIONAL TRADE CO., LTD Qingdao Top Run International Trade Co., Ltd. has been a professional and leading supplier of construction machinery spare parts in China for over 15 years. With extensive experience and expertise, we have established strong partnerships with top manufacturers to offer a wide range of genuine and OEM parts for brands such as XCMG, SANY, ZOOMLION, SHANTUI, LIUGONG, and more. 80+ Employees View more Looking for properate products? Contact us
Send Message
How to replace the synchronizer in a truck crane gearbox?
Jul 7, 2025
View: 142
Hey there! I'm a supplier of Truck Crane Gearboxes, and today I'm gonna walk you through the process of replacing the synchronizer in a truck crane gearbox. It's a crucial part of maintaining your crane's performance, so let's dive right in.
First off, you gotta understand what a synchronizer does. In simple terms, it's like a mediator between the gears in your gearbox. When you shift gears, the synchronizer helps match the speeds of the gears so that the shift is smooth and doesn't cause any grinding or damage. If your synchronizer is worn out or damaged, you'll notice things like hard shifting, gear slippage, or even strange noises when you're changing gears. That's when it's time to replace it.
Tools and Materials You'll Need
Before you start, make sure you've got all the right tools and materials. You'll need a set of wrenches, sockets, a torque wrench, a pry bar, a bearing puller, and some lubricant. You'll also need the new synchronizer, of course. If you're looking for high - quality crane parts, you can check out Crane Pump Parts. They've got a great selection of parts that are compatible with many truck crane models.
Preparation
Safety first! Park your truck crane on a flat, stable surface and engage the parking brake. Disconnect the battery to prevent any electrical mishaps. Then, drain the transmission fluid from the gearbox. This is important because you don't want fluid spilling everywhere when you start taking the gearbox apart. Make sure you have a proper container to collect the fluid.
Removing the Gearbox
Now, it's time to get the gearbox out. First, remove the driveshafts that are connected to the gearbox. You'll need to loosen the bolts that hold the driveshafts in place. This might take a bit of muscle, but with the right wrench, you should be able to do it. Once the driveshafts are off, remove the linkage that connects the gear shifter to the gearbox. This is usually just a matter of removing a few bolts or pins.
Next, support the gearbox with a transmission jack. You don't want it to fall and cause any damage. Then, remove the bolts that hold the gearbox to the engine. There are usually a bunch of them, so take your time and keep track of where each bolt goes. Once all the bolts are out, carefully lower the gearbox using the transmission jack.
Disassembling the Gearbox
With the gearbox out, it's time to open it up. Remove the cover of the gearbox. You'll see a bunch of gears and other components inside. Be careful not to lose any small parts. Locate the synchronizer. It's usually near the gears that it's responsible for synchronizing.
Use your bearing puller to remove the old synchronizer. This can be a bit tricky because the synchronizer is usually tightly fitted. You might need to apply some force, but be gentle to avoid damaging other parts of the gearbox. Once the old synchronizer is out, clean the area where it was located. Use a clean cloth and some solvent to get rid of any dirt or debris.
Installing the New Synchronizer
Now, it's time to put the new synchronizer in. Before you do, make sure to lubricate the new synchronizer with the lubricant you have. This will help it work smoothly. Carefully place the new synchronizer in the correct position. Make sure it fits snugly and is properly aligned with the gears.
Once the synchronizer is in place, you can start reassembling the gearbox. Put the cover back on and tighten the bolts. Make sure to use the torque wrench to tighten the bolts to the correct specifications. This is important because if the bolts are too loose, the gearbox might leak fluid, and if they're too tight, you could damage the gearbox.
Reinstalling the Gearbox
After you've reassembled the gearbox, it's time to put it back in the truck crane. Use the transmission jack to lift the gearbox back into place. Align it with the engine and start putting the bolts back in. Again, make sure to tighten the bolts to the correct torque.
Reconnect the linkage that connects the gear shifter to the gearbox. Then, reattach the driveshafts. Make sure they're properly aligned and the bolts are tightened.
Filling the Transmission Fluid
Once the gearbox is back in and everything is connected, it's time to fill the transmission fluid. Use the correct type of transmission fluid for your truck crane. You can usually find this information in the owner's manual. Pour the fluid into the gearbox until it reaches the correct level.
Testing
Before you take your truck crane out for a spin, start the engine and let it idle for a few minutes. Shift through the gears to make sure everything is working smoothly. Listen for any strange noises or vibrations. If everything seems okay, you're good to go!
Conclusion
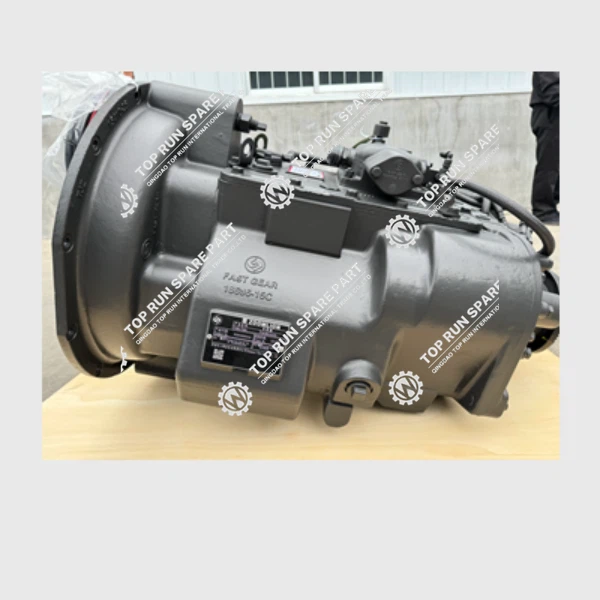
Replacing the synchronizer in a truck crane gearbox is definitely a challenging task, but with the right tools, a bit of patience, and some know - how, you can do it. If you're in the market for a reliable gearbox or other crane parts, we've got you covered. We're a leading supplier of Gear Box ASSY/Transmission 8JS118TB - B 1030300034 G7854 and Truck Crane Hook. Our products are of high quality and are designed to meet the needs of your truck crane.
If you have any questions about replacing the synchronizer or need help finding the right parts for your truck crane, don't hesitate to reach out. We're here to assist you in any way we can. Whether you're a professional mechanic or a DIY enthusiast, we've got the parts and the knowledge to keep your truck crane running smoothly.
References
- "Truck Crane Maintenance Handbook"
- Manufacturer's manuals for truck crane gearboxes
Categories
QR Code


